Getting Started Guide: STM32F405RGT6 MCU-Card
Set up the Arduino IDE to program the STM32F405 MCU card on Orbit-Q, using the official STM32duino core.
Prerequisites
| Requirement | Notes |
|---|---|
| Arduino IDE | Version 2.x recommended |
| Orbit-Q board | With STM32F405 MCU card seated |
| USB Type-C cable | For CP2102 UART connection |
1. Configure Arduino IDE
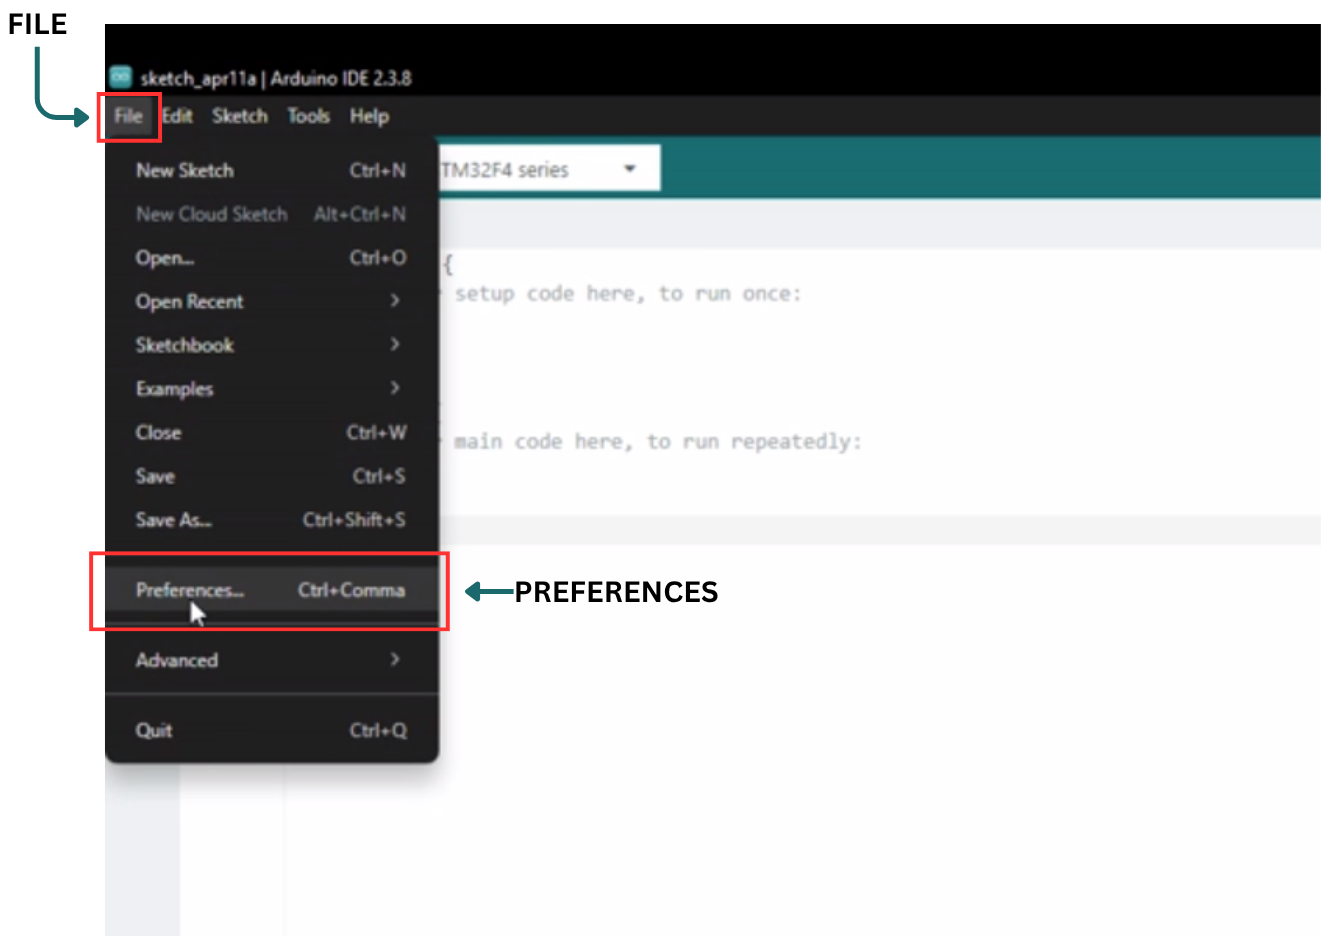
Open the Preferences window by navigating to File > Preferences.
2. Add Board URL
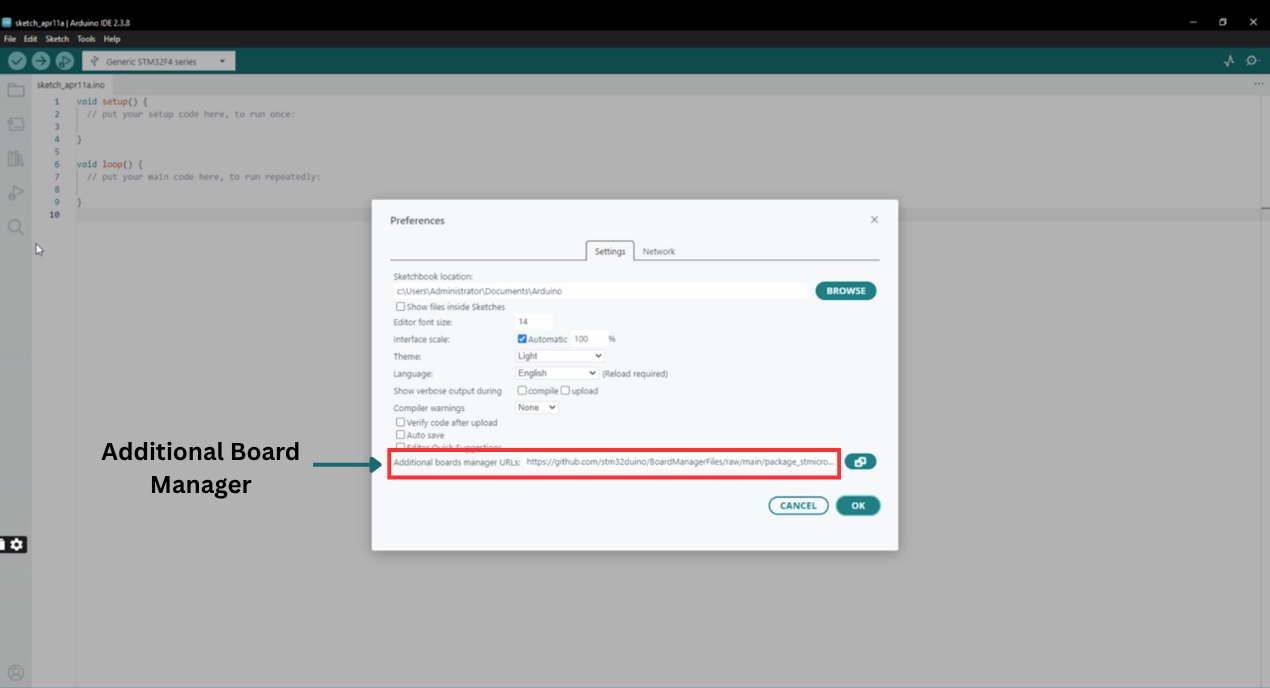
In the "Additional Boards Manager URLs" field, paste the official STM32 index link:
https://github.com/stm32duino/BoardManagerFiles/raw/main/package_stmicroelectronics_index.json
3. Install Boards
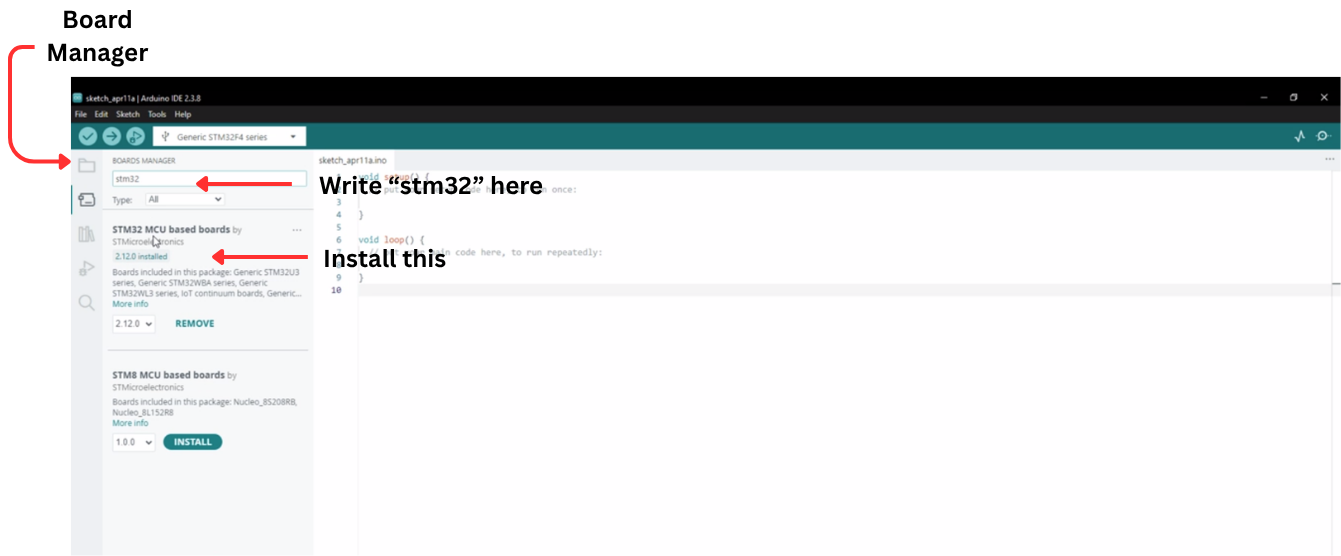
- Go to Tools > Board > Boards Manager
- Search for "STM32 MCU based boards"
- Click Install
4. Install Support Tools (Optional but Recommended)
Download and install STM32CubeProgrammer from STMicroelectronics. It acts as a bridge for uploading code and ensures you have the necessary USB/SWD drivers installed.
Download STM32CubeProgrammer from STMicroelectronics
5. Select Your Board and Settings
Once installed, configure your hardware settings under the Tools menu:
| Menu Item | Selected Setting | Notes |
|---|---|---|
| Board | Generic STM32F4 series | Core STM32 architecture package |
| Board Part Number | Generic F405RGTx | Target MCU variant |
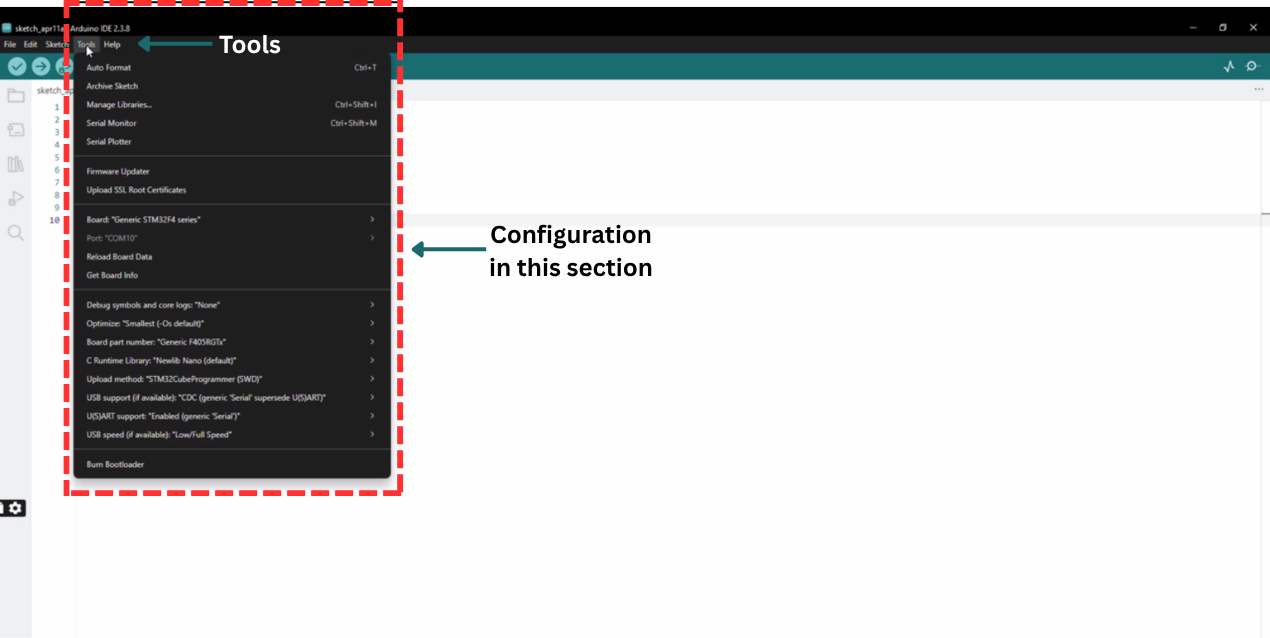
Upload Method — this depends on your hardware connection:
| Method | Use Case |
|---|---|
| ST-Link | Best for debugging; requires an ST-Link V2 programmer |
| STM32CubeProgrammer (Serial) | Used with a USB-to-TTL adapter |
| STM32CubeProgrammer (DFU) | Used if your board has a native USB port and DFU bootloader |
Troubleshooting
Board Not Appearing in Boards Manager
- Confirm the board URL was pasted exactly as shown, with no extra spaces
- Restart the Arduino IDE after adding the URL — the Boards Manager list only refreshes on launch
- Check your internet connection; the Boards Manager fetches the index live from GitHub
STM32CubeProgrammer Not Detecting the Board
- Confirm USB drivers were installed correctly during STM32CubeProgrammer setup
- Try a different USB cable — some cables are power-only and lack data lines
- On Windows, check Device Manager for the correct COM port assignment
Next Step
Once your environment is configured, head to the Blink Example to flash your first program.